

So you’re wondering how long it takes to learn the Violin. . Many folks ponder this question, and it’s unfortunate that there isn’t a universal answer.
However, you know what they say: practice makes perfect!
We all desire to be proficient in an instrument within minutes. Just imagine the captivating tunes you could create! But to learn an instrument, like any other skill, requires time and dedication. It all comes down to practice, whether it’s driving a car, hitting a golf ball, or playing the Violin.

But here’s the good news – learning the Violin can be an enjoyable experience! It’s a magnificent instrument with a soprano sound that can be played in different settings, whether it’s in your spare time or as part of a string band. And if your ambition is to play professionally, be prepared for a rigorous commitment to hard work over several years.
So, how long does it take to learn the Violin? The answer depends on how much effort you’re willing to put in. With a consistent training schedule, you can make considerable progress in 3 to 5 years. Keep up with your practice routine, and before you know it, you’ll be creating beautiful melodies in no time!


Is it hard to learn the Violin?
Have you ever wondered if learning the Violin is a challenging feat? Well, the truth is, it can be different for everyone.
At first, learning the basics such as holding the instrument and playing notes may not be too difficult. However, becoming a skilled violinist will require some dedication and practice.
But do not worry! You can improve your skills by implementing a few key tips.
Firstly, learn music theory, as understanding the principles of music can significantly enhance your playing abilities.
Secondly, make sure to warm up your muscles before playing, just like any other physical activity. You may also find it helpful to use violin tabs when learning sheet music.
Finally, it is essential to have patience and persistence. Remember, mastering any skill takes time, so keep practicing, and you will gradually improve.
So, to answer the question: Is it hard to learn the Violin? Yes, it can be challenging, but with dedication and hard work, you can become a skilled violinist.
Keep in mind that practice makes perfect!

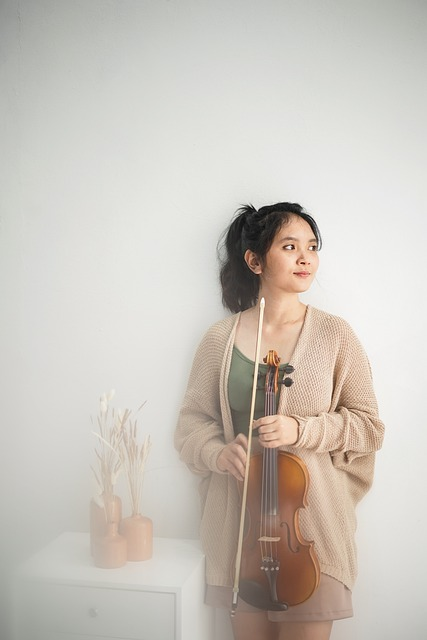
How to buy your first Violin
Buying a violin can be a bit tricky, but don’t worry, I’ve got your back! There are a few things you need to consider before making your final choice, so let’s dive in.
First things first, are you an adult beginner or are you buying it for your child? And are you planning on taking the violin seriously or just playing it for fun? These are important questions to answer before moving forward. And of course, the big one: what’s your budget?
Now, I know we all want to save some money, but hear me out. You don’t want to go for the cheapest option out there. Trust me, those violins can be a total nightmare to play. The sound is often terrible, the pegs can be misaligned or drilled the wrong way, and it can be a frustrating experience all around.
But don’t worry, I’ve got some great options for you. We’ll take a look at a few websites together and find a violin that fits your needs and budget.

First up, we’ve got fiddlershop.com. They’ve got a great range of violins, with prices ranging from a couple of hundred bucks to over $27,000! They’re all tested and approved by their team and come with a limited warranty and a 45-day return policy. Definitely, a good option if you want quality and good service.
Next up, we’ve got eBay. Now, this can be a great option if you’re looking to snag a good deal on a second-hand violin. But be careful, there are some super expensive violins on there too, and you want to make sure you’re not getting scammed.
Finally, there’s Amazon. Now, I wouldn’t normally recommend buying a violin on Amazon, but they do have a great return policy and tons of reviews to help you make a good choice. But be careful of the super cheap options, they’re often not worth the money.
You want a violin that you can rely on when practicing. It will make reaching your goals a lot easier and more enjoyable. You don’t need to spend much money, but you must be realistic and understand that you’ll get what you pay for.

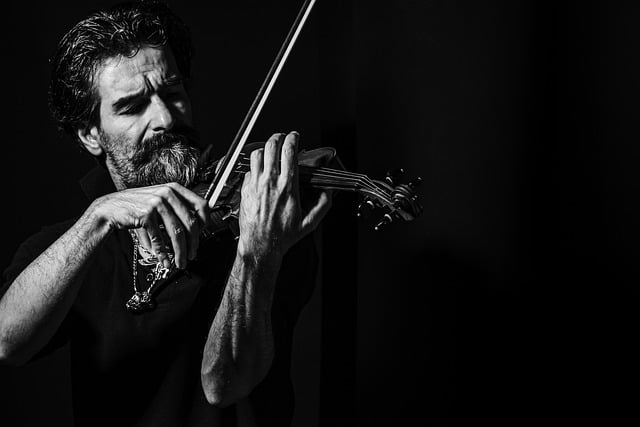
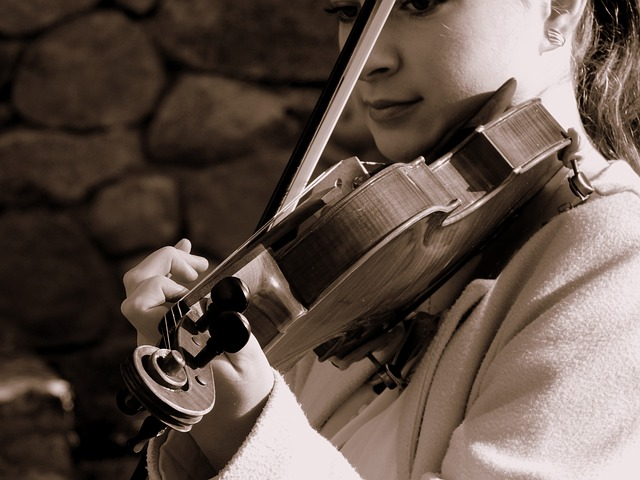
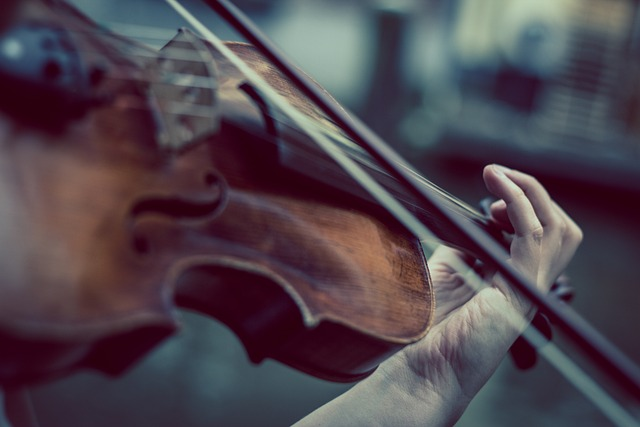
How to hold a Violin
So you’ve just got your hands on a violin, and you’re eager to start playing. But wait, how do you even hold it? Don’t worry; we’ve got you covered!
The first and most important thing to keep in mind is comfort and relaxation. Believe me, holding a violin for an extended period can be a pain, quite literally. So make sure you’re not straining your muscles and that you feel comfortable.
As you may have guessed, there’s no one-size-fits-all approach to holding a violin. Our bodies are unique, and so is our way of holding the instrument. But fret not; we’ll walk you through the basics so that you can find what works for you.
Before we start, let’s get familiar with the parts of a violin. We have the chin rest, shoulder rest, tailpiece, neck, head, and shoulders. Now that we know what’s what, let’s get into the nitty-gritty.
Shoulder rest or no shoulder rest? That’s a personal choice. Some violinists swear by it, while others prefer to do without it. The key is to do what feels comfortable for you, not what looks cool.


Now, let’s start with the shoulder rest. Place your right hand by the tailpiece and your left hand on the shoulder of the violin. Next, extend your left arm out and bring it back to rest on your left shoulder. Make sure the tailpiece is right above your collarbone, and the button is slightly touching your neck.
Here’s a pro tip: keep your chest up! It not only helps you hold the violin correctly, but it also improves your playing.
Now, place the violin on the left side of your shoulder, with the button pointing towards your neck. Tilt the violin slightly to the left, with the strings facing upwards. You should be able to hold the violin in this position with ease, thanks to a little support from your shoulder.
Moving on to the left hand, we want to hold the violin primarily with our neck and shoulder, not grip it tightly with our hand. Turning your head about 45 degrees towards the violin and letting the weight of your head hold it in place is the way to go.
With practice, you’ll find the perfect balance and position that works for you. So, don’t fret if it takes a while to get the hang of it. Remember, comfort is key, and you’re well on your way to playing beautiful music.
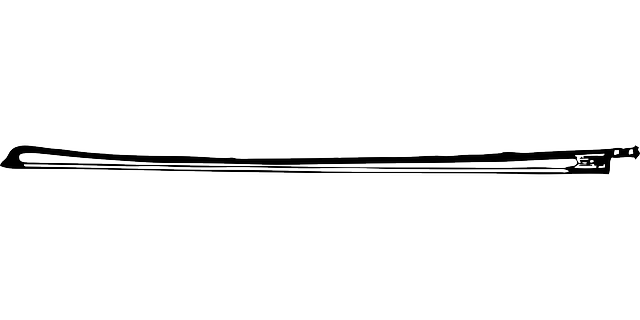

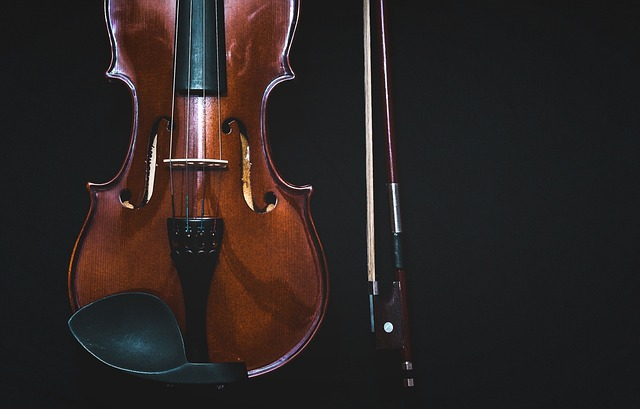
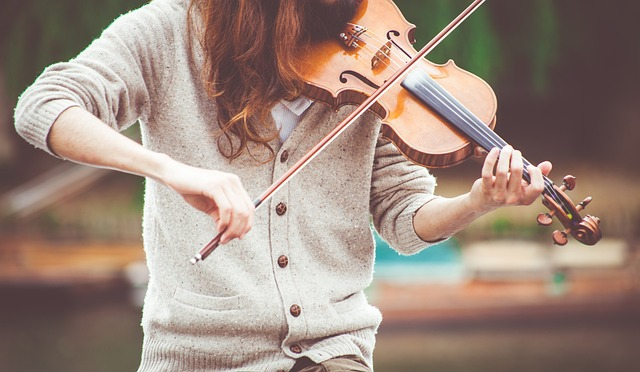
How to hold a Violin Bow
If you’re a beginner violinist, you may be wondering how to hold that little stick we call a bow. Don’t worry; I’ve got your back! I’ll show you how to set up a reliable bow grip and the function of each finger of your right hand afterward.
Before we start, let’s get familiar with the different parts of the bow. The stick holds the hair of the bow in place and is often made of wood or carbon fiber. The bow hair, usually made of horsehair, is used to glide across the strings, creating a sound.
The tip is at the uppermost point of the bow, and the hair is attached to the stick through the tip plate. The Frog is where we hold the bow, and it includes smaller parts like the winding, grip, and screw that tighten and loosen the bow hair.
Now, the real deal – how to hold the bow. I use the Franco Belgian bow hold, which I’ve mastered over time and feel comfortable teaching my students. Remember, the key to any bow grip is comfort and relaxation. You want to avoid cramping your hand and fingers.
Start by putting the bow right under the middle phalange of your fingers and let your fingers fall over the side of the Frog. Then, bring your thumb in a round shape between the Frog and the grip.
The bottom part of your thumb should touch the hair of the bow if correctly placed. Finally, lean your hand towards your pointer finger until your pinky effortlessly goes on top of the bow.

Make sure the distance between your fingers is the same as when you let your hand hang completely relaxed. Your fingers, including the thumb, should be round and comfortable. The middle finger secures the fulcrum, while the index finger applies bow pressure onto the string and controls the sounding point. The ring finger also controls the sounding point and can pull the bow towards the fingerboard. Finally, the pinky can lift the bow pressure.
Practice makes perfect, so grab your violin and bow, and start practicing! Holding a bow correctly not only improves your sound quality but also prevents hand injuries, so make sure you’re doing it right. Don’t worry if your bow grip is slightly different from others; what matters is that it’s comfortable for you. So, have fun and happy practicing!
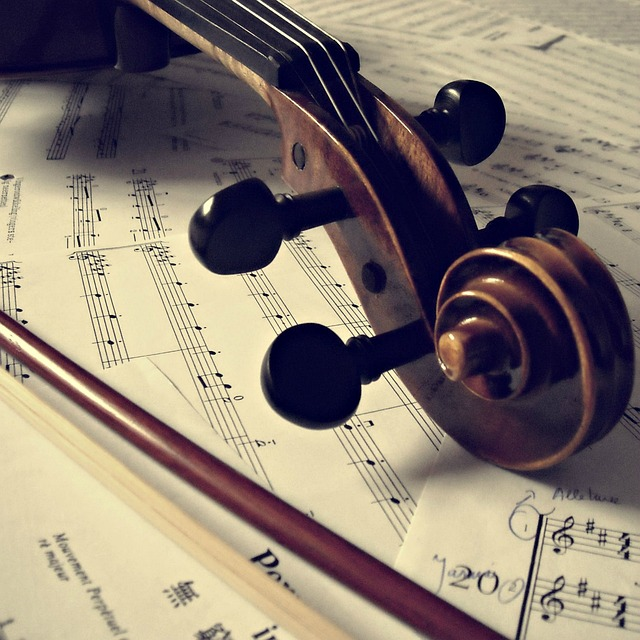

How To Tune A Violin
Tuning your violin can be a bit frustrating, but once you know the right techniques, it will be a piece of cake. In this article, we’ll be discussing how to tune your violin using pegs and fine tuners.
If you’re a beginner, I recommend starting with the fine tuners. Trust me, it’s easier to break a string using the pegs, and you don’t want to panic when that happens. It’s not a fun experience, and your violinist heart will shatter into a million pieces.
Before you start tuning, you need to know two things. First, learn what pitch each string should be. The thickest string is G, followed by D, A, and E. Second, understand the meaning of Flat and Sharp. Flat means the pitch is too low, and sharp means the pitch is too high. Got it? Great!
To use the tuner, download a tuner app from the app store. I use the Ultimate Violin Tuner app on my phone. Open the app, and authorize microphone usage. Start with the A string. If the needle is pointing to the left, turn the adjuster clockwise to make the pitch sharper. If it’s pointing to the right, turn the fine-tuner counterclockwise to make the pitch flatter. Simple, right? Repeat this process for the D, G, and E strings.

If you pluck a string and it doesn’t match the note it’s supposed to be, it’s time to use the pegs. Keep in mind that pegs are not technological at all, and they can be tricky to use. Here are some things to consider:
Peg jam. If the peg gets stuck, hold your violin upright and turn the peg counterclockwise to remove some of the tension in the string.
Peg slipping. Push inward while turning the peg in a similar motion to driving a screw to stop it from slipping.
Breaking strings. Turn the peg a little at a time and keep an eye on the tuner. If you tighten it too much, you’ll break the string.
Detuning other strings. Tuning one peg can affect the tuning of the other strings. Recheck them all after adjusting one peg.
Lastly, you can also tune your instrument by listening to the notes of a keyboard, tuning fork, or another musical instrument. But, this method is suitable for more advanced players.

Playing Violin – The Main Stepstones
Now, one question that many violin students have is: how long does it take to learn the Violin? If you take lessons and practice regularly (4-5 days a week), here’s a rough timeline to give you an idea. Of course, everyone learns at a different pace, so don’t get too caught up in the numbers.
The most important thing is to find a method of learning that works for you. For example, some people prefer a skilled teacher to guide them. In contrast, others prefer to teach themselves using books and tutorials. Having an experienced teacher can considerably speed up the learning process. The following milestones can guide your learning journey.
Step 1: The Beginning Fundamentals
As you embark on your journey to master the art of the Violin, the first step is to lay a strong foundation. The fundamentals are key, my friend! You’ll learn everything from the parts of your Violin to the proper way to hold your bow and care for your instrument. These are the essential habits that will set you up for success, whether you’re pursuing the Violin as a hobby or aiming for the big leagues.
Your early violin lessons will focus on developing the rock-solid groundwork that you need to succeed. You’ll learn about posture, note reading, scales, and music theory. These skills will form the backbone of your future progress on the Violin. You’ll also dive into playing techniques like pizzicato and bowing open strings to help you understand the different notes and how to control the weight and sound of your bow.
As you become more comfortable with the basics, you’ll start adding your fingers and playing exercises on one string. This will help you build up the muscle memory and dexterity you need to play more complex music. Eventually, you’ll learn how to cross strings with your bow, a vital skill for many pieces of music.
The next few months are going to be exciting times as you continue to build on your foundation and start learning music you personally know.
Step 2: 6 months of Learning the Violin
As you continue to learn the Violin, these months are exciting because you’ll start playing some simple songs you recognize. You’ll learn lots of new notes, including the notes on the A and E strings, using all your fingers. And gradually, you’ll switch from plucking the strings to using your bow to play songs. You’ll learn new rhythms like whole notes, whole rests, eighth notes, and eighth rests, and become more familiar with the fingerboard and where to position your left-hand fingers to play notes other than open strings.
Furthermore, you’ll continue to improve your skills in correctly holding your instrument and bow. You will understand notes on the fingerboard and bow directions. To focus on specific techniques, you’ll work on exercises and short pieces that help you practice a particular skill. You’ll also learn the difference between staccato (short and detached) and legato (smooth and connected) bowing.
By the end of month six, you’ll have even more control over your bowing technique. You’ll be comfortable using the entire bow length and crossing strings more effectively. This opens up a whole new world of violin playing for you! Keep practicing, and you’ll be amazed at how far you’ve come.

Step 3: Learn Violin for 1 year
As you continue your journey with the Violin, you’ll reach a point where you can play a variety of pop, rock, classical, and folk songs. You’ll have learned so many notes and rhythms by this point that you’ll be able to dramatically increase the number of pieces you can play, branching out into music you really like.
In your second year of learning, you’ll continue to develop your skills and learn even more notes. You’ll use all four of your fingers to play the notes on the fingerboard in first position, including sharps, naturals, and flats. This will allow you to play in flat keys, not just D and A major. You’ll also encounter new bow markings like slurs and hooked bows and learn how to bounce the bow and play faster and more accurately.
You’ll work on more challenging rhythms like dotted and syncopated rhythms and continue to improve your tone quality as you play faster music. Over the next few years, you’ll solidify all the notes in the first position and become even more comfortable playing in flat keys. Your bowing will become more complex and varied, and you’ll start to understand double stops and triplets.
Around the 2-3 year mark, you’ll learn how to shift your left hand higher up the fingerboard into the third position, opening up a whole new range of higher notes on the Violin. The higher you shift on the e-string, the farther your range. You’ll also learn how to play vibrato, which will help produce a more nuanced sound and allow you to play with more expression. As your violin tone improves, your confidence will increase.

Step 4: 5 Years of Learning the Violin
If you’re a dedicated violin student, you’ll find yourself at the five-year mark with your confidence soaring. You may even want to start performing in orchestras or chamber music groups and giving informal concerts to family and friends. You’ll be shifting into higher positions, tackling more complex songs, as well as continuing to master advanced fingering and bowing techniques.
Picking up sheet music to your favorite songs will be much easier now that you’ve been playing Violin for a while. By year five, you’ll be proficient at the Violin. Still, there’s no limit to what you can learn and where you can go – the more you practice, the faster you can increase your skills and discover even more music you love to play.
Staying motivated is essential regardless of your goals and how far you want to take your violin playing. Keep this map in sight to keep your goals in focus.

How Long does it actually take to learn Violin?
Learning the Violin is a journey that can take different amounts of time for different people, depending on individual goals and dedication to practice. While it’s impossible to predict precisely how long it will take to learn the Violin, private lessons with a qualified Violin teacher can help you make faster progress. Even professional violinists, who have been playing for many years, continue to learn and fine-tune their skills. The key is to stay motivated and committed to the process and remember that there is always more to learn, no matter your age or skill level. So, if you’re wondering how long it will take you to learn the Violin, the answer is simple: as long as you keep practicing and striving to improve, the sky’s the limit!